
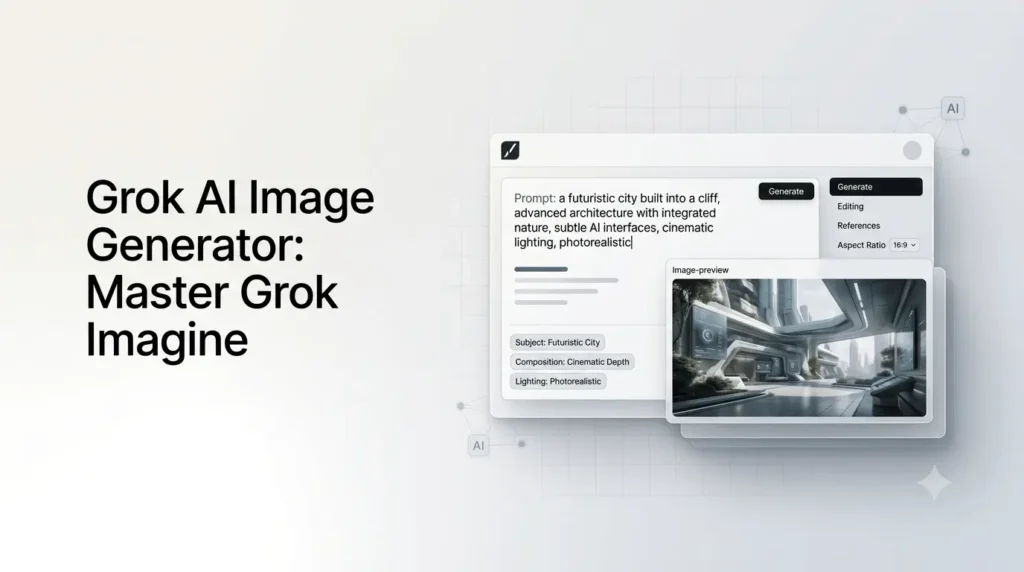
The Grok AI image generator has evolved into a broader visual creation platform, and the current version is far more capable than the early image-generation experience associated with Grok.
Today, Grok Imagine uses grok-imagine-image-2.0 for image generation and editing. xAI made Imagine Image 2.0 generally available as its new Quality Mode on grok.com/imagine and the iOS and Android apps on August 7, 2026. The company says the model is designed for stronger instruction following, typography, layout, and preservation of important elements during generations and edits.
For users, that changes the prompting strategy.
You do not need to write enormous prompts packed with random style keywords. The better approach is to give Grok a structured visual brief: what to create, where it should appear, how it should look, what matters most, and what should remain unchanged.
This playbook explains how to do exactly that.
Quick Summary
- Grok Imagine is xAI’s AI image-generation and editing platform, powered by Imagine Image 2.0.
- Better results come from structured prompts covering subject, environment, composition, lighting, style, and details.
- Reference images and targeted edits help maintain character, product, and visual consistency.
- For professional results, iterate step-by-step instead of rewriting the entire prompt.
- The guide also covers prompt templates, aspect ratios, pricing, API access, limitations, and practical workflows.
What Is the Grok AI Image Generator?
The Grok AI image generator is the image-generation component of Grok Imagine, xAI’s multimodal creation platform. The current grok-imagine-image-2.0 model can generate images from text prompts and edit existing images using natural-language instructions. xAI’s API also provides controls for aspect ratio, resolution and the number of generated images.
Grok itself is available through the web at Grok.com and through iOS and Android applications. xAI’s consumer documentation describes Grok Imagine as the place to create images and video within the broader Grok experience.
The current Imagine ecosystem includes:
- Text-to-image generation
- Natural-language image editing
- Multi-image reference workflows
- Aspect-ratio controls
- 1K and 2K image generation through the API
- Image-to-video workflows
- Video generation and editing
- Typography and layout-focused generation
- Creative templates and workflow-oriented features
The distinction between Grok and Grok Imagine is therefore useful: Grok is the broader AI assistant, while Imagine is its visual-generation environment.
What Changed With Grok Imagine Image 2.0?
Imagine Image 2.0 is the most important update to understand if you are learning the Grok AI image generator today.
xAI announced Image 2.0 on August 7, 2026, describing it as a model built around precise image generation and editing for practical creative work. The company specifically highlights instruction following, typography and layout planning, and the ability to preserve elements across generations and edits.
That makes the model particularly interesting for users who need more than decorative AI artwork.
Image 2.0 at a Glance
| Capability | Current Status |
|---|---|
| Model | grok-imagine-image-2.0 |
| Text-to-image | Yes |
| Image editing | Yes |
| Reference images | Yes |
| API resolution | 1K and 2K |
| API image output | Up to 10 images per request |
| Aspect-ratio control | Yes |
| Typography | Improved |
| Layout handling | Improved |
| API pricing | Starts at $0.04 per generated image |
| Consumer availability | Grok.com, iOS and Android |
The API documentation currently lists $0.04 for a 1K low-quality output, with higher prices for higher resolution and quality settings.
Why Does This Matter for Prompting?
Older AI image-generation advice often revolves around keyword stacks:
cinematic, ultra detailed, 8K, masterpiece, beautiful, dramatic, realistic…
That approach is becoming less useful.
A model designed to follow natural-language instructions more closely can benefit from something closer to an art director’s brief.
Instead of:
futuristic city, cinematic, beautiful, realistic, 8K
Try:
Wide editorial photograph of a futuristic Asian megacity after rainfall, viewed from street level. Elevated transit rails cross between high-rise buildings while pedestrians move through reflective streets. Soft evening light, restrained blue-gray palette, realistic architecture, subtle atmospheric haze, cinematic but believable photography.
The second prompt tells Grok what the image actually needs to contain.
Grok Imagine Prompt Formula
A reliable starting formula is:
Subject + Action + Environment + Composition + Lighting + Style + Details + Constraints + Output
You do not have to use every component every time.
The formula simply gives you a framework for deciding what information matters.
1. Subject
What is the primary thing in the image?
A premium black wireless headphone
is better than:
A cool product
2. Action or State
What is happening?
Resting on a stone pedestal
3. Environment
Where is it?
In a minimalist luxury studio
4. Composition
How should it be framed?
Centered three-quarter product shot with generous negative space
5. Lighting
How should the scene be illuminated?
Soft directional studio lighting with controlled reflections
6. Style
What visual language should it use?
High-end commercial product photography
7. Details
What characteristics matter?
Matte-black finish, brushed-metal accents, realistic material texture
8. Constraints
What should Grok avoid or preserve?
Keep the product shape and proportions unchanged
9. Output
Where will the image be used?
Designed as a 16:9 website hero image
Put together, those instructions become a genuine creative brief rather than a collection of keywords.
How to Write Better Grok Imagine Prompts?
Start With the Visual Hierarchy
Before writing the prompt, decide what viewers should notice first.
For a product advertisement:
Product → lighting → background
For a character scene:
Character → action → environment
For an editorial technology graphic:
Main concept → interface → supporting details
This prevents the prompt from giving equal importance to everything.
For example:
A cybersecurity analyst working at a workstation
is broad.
A more controlled version is:
Main subject: cybersecurity analyst seated at a workstation in the foreground, viewed from a three-quarter rear angle. Secondary elements: subtle security dashboards on background monitors. Modern dark office, soft neutral lighting, restrained blue-gray palette, realistic editorial photography.
The hierarchy is clearer.
How to Control Composition in Grok Imagine?
Composition is one of the easiest ways to make an AI-generated image more useful.
Tell Grok where the subject belongs.
Useful instructions include:
- centered composition
- subject on the left third
- subject on the right third
- wide establishing shot
- close-up
- medium shot
- low-angle view
- overhead perspective
- symmetrical composition
- foreground subject
- background subject
- generous negative space
For a blog featured image:
Place the primary visual subject on the right side of the frame and leave clean negative space on the left for a headline overlay.
That instruction is often more useful than simply saying:
Make it suitable for a website.
Why Negative Space Matters?
AI-generated images often look attractive but become difficult to use when text needs to be placed over them.
If you are creating a feature image, explicitly tell Grok where the text will go.
Example:
Wide 16:9 editorial composition, main AI interface positioned on the right, approximately one-third of the left side kept visually clean with a subtle gradient and no important objects.
That creates a much more practical publishing asset.
How to Control Camera Perspective?
For photographic images, camera language can provide another layer of control.
Useful descriptions include:
- close-up portrait
- medium shot
- wide-angle establishing shot
- three-quarter view
- low-angle perspective
- overhead shot
- eye-level camera
- shallow depth of field
- deep depth of field
- foreground-focused composition
For example:
Low-angle three-quarter view of a futuristic electric vehicle parked on a wet city street, architecture rising behind it.
This produces a very different visual hierarchy from:
Eye-level side profile of an electric vehicle.
You do not need to specify a lens in every prompt. Add camera details when they solve a composition problem.
How to Prompt Grok Imagine for Photorealism?
The word “photorealistic” alone does not guarantee a convincing photograph.
Describe the photographic conditions.
Instead of:
Photorealistic woman in an office.
Try:
Editorial photograph of a technology professional in her early 30s working in a modern office, natural skin texture, realistic fabric, subtle imperfections, soft window light from the left, shallow depth of field, candid expression, neutral color grading, realistic photography.
You have now described:
- Subject
- Environment
- Lighting
- Texture
- Depth
- Mood
- Photography style
That gives the generator much more useful information.
How to Control Lighting?
Lighting can dramatically change an otherwise identical prompt.
Soft Natural Light
Soft morning window light, gentle shadows and natural highlights.
Studio Lighting
Controlled studio lighting, soft frontal fill, subtle rim light and realistic product reflections.
Cinematic Lighting
Strong directional side lighting with atmospheric shadows and restrained contrast.
Golden Hour
Warm low-angle sunlight at sunset, long soft shadows and subtle atmospheric haze.
Avoid throwing five contradictory lighting styles into one prompt.
Choose the lighting that supports the subject.
How to Use Style Without Overloading the Prompt?
Style should clarify the desired visual language.
Useful categories include:
- Editorial photography
- Commercial product photography
- Documentary photography
- Cinematic science fiction
- Minimalist 3D design
- Architectural visualization
- Fashion photography
- Concept art
- Vintage photography
- Technical illustration
- Modern editorial design
Compare:
futuristic city, beautiful style
with:
Contemporary architectural editorial photography, realistic high-rise structures, restrained color grading, natural atmospheric perspective and sophisticated composition.
The second tells Grok what kind of visual treatment you want.
Grok Imagine and Typography
Typography is one of the areas xAI specifically emphasizes with Image 2.0.
xAI says the model plans typography and layouts more like a designer and is intended to handle dense multi-part visuals and small text more effectively.
That makes it useful for:
- Posters
- Menus
- Editorial graphics
- Infographics
- Promotional designs
- Social graphics
- Event artwork
Instead of:
Create an AI conference poster.
Use:
Minimal AI conference poster. Large headline at the top reading “AI FUTURE 2026”. Smaller subtitle underneath. Three clean visual sections across the center. Date and location aligned at the bottom. Off-white background, charcoal typography, muted steel-blue accents, precise editorial grid, generous spacing.
You are specifying the information architecture, not just the subject.
Still, generated text should be checked before publishing. Better typography does not mean every generated word will always be perfect.
How to Use Reference Images?
Reference images can solve problems that text alone cannot.
The current Imagine API supports image editing with reference images. xAI’s documentation says multi-image editing can use up to five source images in a request for combining subjects, transferring styles and composing scenes.
For example, imagine you want to create a consistent product campaign.
You could provide:
- Image 1: Product
- Image 2: Brand environment
- Image 3: Model or person
- Image 4: Lighting reference
- Image 5: Composition reference
Then explain the role of each.
Example
Use image 1 as the product reference. Preserve its shape, proportions and material finish. Use image 2 as the environment reference. Use the lighting direction from image 4. Place the product naturally within the environment while maintaining realistic scale and perspective.
This is far more precise than:
Combine these images.
The Preserve-and-Change Technique
One of the most useful prompting patterns for image editing is:
Preserve X. Change Y.
For example:
Preserve the person’s face, hairstyle, clothing and body proportions. Change the background to a modern technology conference stage. Keep the original camera perspective and lighting direction.
Or:
Preserve the product design, logo placement and proportions. Replace the background with a minimalist off-white studio. Add soft directional lighting and a natural shadow beneath the product.
This tells Grok exactly what should remain stable.
How to Iterate Like a Professional?
The first generation should not always be treated as the final result.
Use a simple loop:
Generate → Inspect → Identify → Edit → Compare → Refine
Suppose your first image has:
- Correct subject
- Correct style
- Wrong background
- Too much empty space
Do not rewrite the entire prompt.
Instead:
Keep the subject, lighting and visual style unchanged. Replace the background with a modern AI research laboratory. Move the subject slightly toward the right third and reduce the empty space.
This makes the next iteration targeted.
Change One Major Variable at a Time
If you simultaneously change:
- Character
- Lighting
- Camera
- Background
- Clothing
- Style
you will not know which change improved or damaged the result.
For controlled iteration, isolate the variable.
Background Problem
Keep everything unchanged except the background.
Composition Problem
Keep the subject and environment unchanged. Move the subject to the left third of the frame.
Lighting Problem
Preserve the composition and objects. Replace the current lighting with soft overcast daylight.
This is closer to professional art direction than repeatedly pressing regenerate.
Grok Imagine Prompting for Different Use Cases
1. Blog Featured Images
For technology websites, prioritize:
- Strong focal point
- Wide composition
- Negative space
- Restrained color palette
- Editorial credibility
Example:
Premium editorial technology image showing an AI image-generation interface transforming a structured text prompt into a sophisticated generated image. UI positioned on the right side, clean negative space on the left, subtle AI nodes and interface elements in the background, off-white and muted blue-gray palette, soft studio lighting, minimal SaaS aesthetic, realistic depth, professional technology publication style, 16:9.
2. Product Photography
Premium wireless headphones placed on a light stone pedestal, three-quarter product view, matte-black materials, realistic metal details, soft studio lighting, controlled reflections, subtle shadow, clean off-white background, luxury consumer electronics photography, minimalist composition.
3. Social Media Graphics
Minimal professional social media graphic about AI image generation, large central visual showing a prompt transforming into an AI-generated image, clean typography hierarchy, off-white background, charcoal and muted blue-gray accents, generous spacing, modern editorial design.
4. Character Art
Consistent female science-fiction explorer, early 30s, short dark hair, distinctive scar above the right eyebrow, dark expedition jacket and compact backpack, realistic proportions, standing inside a snow-covered research station, cinematic natural lighting, realistic environmental details.
5. Marketing Campaigns
Premium skincare product campaign featuring a glass serum bottle on a sculptural stone surface, soft morning light, minimal luxury environment, realistic reflections, neutral beige and gray palette, sophisticated commercial photography, generous negative space for advertising copy.
How to Choose the Right Aspect Ratio?
The output format should match the destination.
| Use case | Suitable ratio |
|---|---|
| Blog feature image | 16:9 |
| Square social graphic | 1:1 |
| Portrait social post | 4:5 |
| Mobile story | 9:16 |
| Presentation | 4:3 |
| Traditional photography | 3:2 |
| Wide cinematic banner | 21:9 |
| Extra-wide website banner | 5:2 |
The current Imagine API provides configurable aspect ratios, and xAI’s documentation lists formats including 1:1, 16:9, 9:16, 4:3, 3:2, 2:1, 21:9 and 5:2.
For website imagery, do not rely entirely on the prompt to determine the composition. If the interface or API gives you an aspect-ratio control, use that control as well.
Grok AI Image Generator Prompt Templates
Photorealistic Template
Create a realistic [SUBJECT] in [ENVIRONMENT]. [CAMERA/COMPOSITION]. [LIGHTING]. Natural textures, realistic materials, subtle imperfections, believable proportions and editorial photography aesthetics. [IMPORTANT DETAILS]. Intended for [USE CASE]. Use [ASPECT RATIO].
Cinematic Template
Cinematic scene showing [SUBJECT] [ACTION] in [ENVIRONMENT]. Wide/medium/close composition from a [CAMERA ANGLE]. [LIGHTING DESCRIPTION]. Atmospheric depth, realistic textures, restrained color grading, subtle environmental details and believable scale. [MOOD]. [ASPECT RATIO].
Product Template
Premium commercial photograph of [PRODUCT] on [SURFACE] in [ENVIRONMENT]. [CAMERA ANGLE]. Soft controlled studio lighting, realistic materials and reflections, subtle natural shadow, clean background, sophisticated advertising photography. Preserve the exact product shape and proportions. [ASPECT RATIO].
Editorial Feature Image Template
Premium technology editorial illustration representing [TOPIC]. Main visual focus: [SUBJECT]. Place the primary element [POSITION]. Clean [BACKGROUND], subtle [TECHNOLOGY ELEMENTS], restrained [COLOR PALETTE], soft shadows, realistic depth, minimal composition and generous negative space for headline placement. Professional technology publication aesthetic. [ASPECT RATIO].
Common Grok Imagine Prompting Mistakes
1. Keyword Stuffing
A prompt containing 30 disconnected style keywords is not necessarily better.
Avoid:
cinematic ultra realistic 8K masterpiece beautiful amazing professional detailed stunning…
Describe what you actually want.
2. Contradictory Instructions
Avoid:
Minimalist crowded scene with lots of empty space and dozens of objects.
Choose the dominant visual direction.
3. Vague Adjectives
Words like:
- cool
- amazing
- beautiful
- awesome
- professional
do not communicate as much as concrete visual descriptions.
Instead of:
A professional office
try:
Modern glass-walled office with clean architectural lines, neutral furniture and soft daylight.
4. Changing Everything at Once
If only the background is wrong, edit the background.
Do not rebuild the entire prompt.
5. Forgetting the Intended Destination
A social post, website hero, product advertisement and mobile wallpaper all require different compositions.
Tell Grok what the image is for.
Grok Imagine for Content Creators and Marketers
The biggest practical advantage of a visual model is not producing one attractive picture. It is producing a repeatable visual workflow.
A content creator can use Grok Imagine for:
- Blog featured images
- Social media artwork
- Article illustrations
- Product concepts
- Marketing visuals
- Campaign mockups
- Character development
- Visual storytelling
- E-commerce concepts
- Presentation graphics
xAI’s Image 2.0 announcement specifically positions the model around practical creative work, including character, location and prop generation while maintaining a consistent visual world.
For a technology publication, a practical workflow could be:
Article → visual concept → structured prompt → first generation → targeted edit → resize → final image
This is much more useful than generating a completely new image every time you need a different format.
Grok Imagine for Developers
Developers can access the current model through the Imagine API.
The current model identifier is:
grok-imagine-image-2.0The API supports image generation from text prompts, image editing, multiple outputs and controls for aspect ratio, resolution and quality.
The API documentation currently lists:
- 1K Low: $0.04 per image
- 2K Low: $0.06 per image
- 1K Medium: $0.06 per image
- 2K Medium: $0.08 per image
Image input is currently listed at $0.01 per image.
That is separate from consumer Grok subscription pricing.
Is Grok Imagine Free?
Grok is free to start, but paid plans provide higher limits and additional access.
xAI’s current pricing page lists SuperGrok at $30/month, with image and video generation included alongside higher rate limits and other features. SuperGrok Plus is listed at $100/month and includes significantly higher usage plus 1080p video creation.
However, consumer usage is not the same as API pricing.
The current Grok documentation says paid users generally use a shared weekly usage pool across Grok products rather than separate daily pools for Chat, Imagine, Voice and Build.
So there are effectively two pricing models to keep separate:
| Access method | Pricing model |
|---|---|
| Grok consumer plans | Subscription |
| Grok Imagine API | Per-image / usage-based |
| API image input | Per input image |
| Higher API resolution/quality | Higher per-image cost |
Always check the current xAI pricing page before publishing subscription figures because consumer plans and limits can change.
Grok Imagine vs. Earlier Grok Image Generation
Grok’s image capabilities have changed substantially.
In December 2024, xAI introduced Aurora, describing it as an autoregressive mixture-of-experts model trained on interleaved text and image data. That early image-generation system was very different from today’s Imagine platform.
The more recent progression looks like this:
| Period | Development |
|---|---|
| Dec. 2024 | Aurora image-generation system introduced |
| Jan. 2026 | Grok Imagine API launched |
| May 2026 | Imagine Quality Mode API introduced |
| Jun. 2026 | Imagine Video 1.5 introduced |
| Jul. 2026 | Imagine Video 1.5 with references |
| Aug. 2026 | Imagine Image 2.0 generally available |
The Imagine API launched in January 2026 as a unified creative API covering image-to-video, video generation and video editing workflows.
Quality Mode arrived in May with a focus on higher realism, stronger text rendering and creative control.
That history explains why older Grok image-generator guides can quickly become outdated.
What Are the Limitations?
No image generator should be treated as a deterministic design application.
Even with stronger instruction following, you may encounter problems involving:
- Exact text
- Tiny typography
- Precise object counts
- Complex diagrams
- Fine logos
- Hands and anatomy
- Exact product geometry
- Spatial relationships
- Consistency between independent generations
The correct response is usually targeted iteration, not simply adding more adjectives.
If the typography is wrong, focus the next prompt on typography.
If the background is wrong, edit the background.
If the character needs consistency, use reference imagery.
If the composition is wrong, change the camera and placement instructions.
A Better Professional Workflow
The following workflow works well for most serious image-generation projects.
Step 1: Define the Goal
Ask:
Where will this image be used?
A website hero image requires different composition from an e-commerce product shot.
Step 2: Define the Focal Point
Decide what viewers should notice first.
Step 3: Write the Core Brief
Include:
Subject + Environment + Composition + Lighting + Style
Step 4: Generate the First Draft
Use it as a visual prototype.
Step 5: Diagnose the Biggest Problem
Do not fix everything at once.
Step 6: Make a Targeted Edit
Use:
Preserve X. Change Y.
Step 7: Adapt the Final Format
Choose the correct aspect ratio and resolution for the destination.
Step 8: Review the Asset Manually
Check:
- Text
- Logos
- Faces
- Hands
- Product details
- Brand consistency
- Cropping
- Composition
- Copyright or trademark-sensitive elements
The Pro-Level Grok Imagine Prompt
If you want one reusable formula for serious projects, use this:
Create [MAIN SUBJECT] [ACTION/POSE] in [ENVIRONMENT]. Make [PRIMARY VISUAL ELEMENT] the focal point. Use [COMPOSITION + CAMERA ANGLE]. Lighting: [LIGHTING]. Visual language: [STYLE]. Include [IMPORTANT DETAILS]. Preserve [ELEMENTS THAT MUST REMAIN CONSISTENT]. Place [SECONDARY ELEMENTS] in [POSITION]. Leave [NEGATIVE SPACE REQUIREMENT] for [TEXT/BRANDING]. Intended for [USE CASE]. Use [ASPECT RATIO/RESOLUTION].
The important part is not the length of the template.
It is the priority structure.
The Real Secret to Mastering Grok Imagine
The best Grok AI image results come from describing visual intent, not finding a magical prompt. Think like a photographer, designer, or art director depending on the result you want. With Image 2.0, Grok Imagine adds stronger instruction following, editing, typography, layout, and preservation controls.
The result is a simple principle:
Do not prompt for a picture. Prompt for a visual outcome.
Conclusion
The Grok AI image generator is no longer best understood as a tool where you type a few descriptive words and hope for a good picture.
Grok Imagine is increasingly suited to a structured creative workflow: define the visual objective, establish the hierarchy, generate a first version, identify the biggest problem, and make targeted edits.
Image 2.0’s focus on instruction following, typography, layout and preservation makes that workflow particularly relevant now.
The most effective prompts are not necessarily the longest. They are the ones that tell Grok what matters, where it belongs, what it should look like, and what should not change.
Once you start treating prompts as creative briefs rather than keyword lists, Grok Imagine becomes much easier to control.
Frequently Asked Questions
1. What is the Grok AI image generator?
The Grok AI image generator is the image-creation capability inside Grok Imagine. The current API model is grok-imagine-image-2.0, which supports text-to-image generation and natural-language image editing.
2. What is the best way to prompt Grok Imagine?
Start with the subject, then describe the environment, composition, lighting, style and important details. For editing, explicitly state what should be preserved and what should change.
3. Is Grok Imagine free?
Grok is free to start, while paid SuperGrok plans provide higher usage limits and include image and video generation. xAI currently lists SuperGrok at $30/month and SuperGrok Plus at $100/month.
4. What model does Grok Imagine use?
The current image model is grok-imagine-image-2.0. xAI made Image 2.0 generally available as the new Quality Mode on August 7, 2026.
5. Can Grok Imagine edit existing images?
Yes. The Imagine API supports natural-language image editing and multi-image editing. Current xAI documentation says up to five source images can be used for workflows such as combining subjects, transferring styles and composing scenes.
6. How much does the Grok Imagine API cost?
The current API pricing for Image 2.0 starts at $0.04 per 1K low-quality output image. Higher resolution and quality levels cost more. Image input is currently priced at $0.01 per image.
Also Read –
Grok 4.6 AI Guide: Everything About Its Features, Pricing, Benchmarks and Availability
SuperGrok Pricing & Features: A Complete Guide (2026)
SuperGrok vs ChatGPT Plus: How to Pick the Best AI Subscription?
Grok Prompt Frameworks: How Structured Prompts Improve AI Results?