
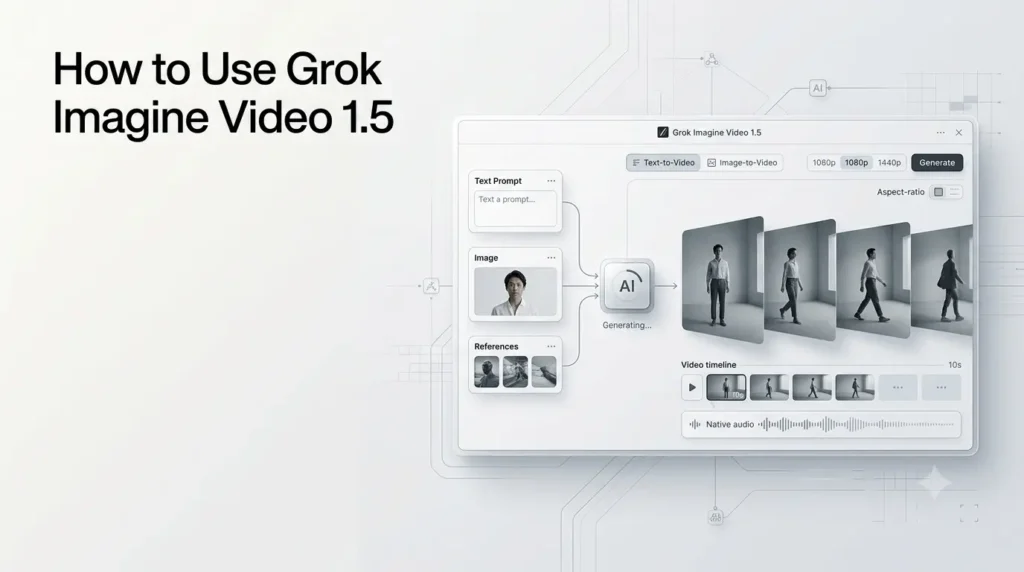
Learning how to use Grok Imagine Video 1.5 is relatively straightforward once you understand the three main generation workflows: text-to-video, image-to-video, and reference-to-video. The current xAI API supports all three, while reference-to-video can use multiple images and preset voices to guide the result.
The model has also evolved significantly since its June 2026 preview. xAI initially released Grok Imagine Video 1.5 as an image-to-video model, but the current version supports text prompts, starting images, multiple visual references, audio references, configurable resolution, aspect ratio, and duration.
This guide explains each workflow, when to use it, how to write better prompts, how references work, and what limitations you should know before generating your first clip.
Quick Summary
- Learn how to use Grok Imagine Video 1.5 for text-to-video, image-to-video, and reference-based video generation.
- Follow simple workflows for creating videos from prompts, images, and multiple references.
- Understand key settings such as resolution, aspect ratio, duration, and audio.
- Get practical prompting tips for better motion, consistency, camera control, and results.
- Discover common mistakes, API options, pricing, and useful workflows for creators and marketers.
What Is Grok Imagine Video 1.5?
Grok Imagine Video 1.5 is xAI’s video-generation model for creating short videos from text prompts, still images, and reference inputs. It can generate video with native audio and supports multiple generation modes through the xAI API.
The current model supports:
- Text-to-video
- Image-to-video
- Reference-to-video
- Native generated audio
- Preset voice references
- 480p, 720p, and 1080p output
- Configurable aspect ratio
- Configurable duration
- Video editing
- Video extension
However, not every feature has identical limits. For example, 1080p is available for text-to-video and image-to-video, while reference-to-video is currently limited to 720p. Reference-to-video also supports up to seven reference images and has a maximum duration of 15 seconds.
What Are the Three Ways to Use Grok Imagine Video 1.5?
The simplest way to choose a workflow is to decide how much control you want over the starting visual.
| Workflow | What you provide | Best for |
|---|---|---|
| Text-to-video | Text prompt | Creating a scene from scratch |
| Image-to-video | Starting image + prompt | Animating a specific image |
| Reference-to-video | Reference images and/or preset voice + prompt | Characters, products, clothing and visual consistency |
The distinction between image-to-video and reference-to-video is particularly important.
With image-to-video, the supplied image acts as the starting frame. With reference-to-video, the references guide the generated scene without necessarily locking the first frame to one of those images.
How to Use Grok Imagine Video 1.5 for Text-to-Video?
Text-to-video is the easiest workflow when you don’t already have a visual asset.
You describe the scene in a prompt, and Grok generates the video.
The current xAI API uses the grok-imagine-video-1.5 model for this workflow. xAI’s documentation says text-to-video supports native 1080p. It also explains that text-to-video runs internally as text-to-image followed by image-to-video.
Step 1: Start With the Scene
Think about what you want the camera to see.
Instead of writing:
A beautiful city.
Give the model a scene and a visual direction:
A cinematic evening shot of a modern city street after rainfall, wet pavement reflecting storefront lights, pedestrians walking naturally in the distance.
The second prompt gives the model considerably more information about the intended scene.
Step 2: Describe the Camera Movement
Camera direction is important for AI video.
Useful instructions include:
- Slow camera push-in
- Gentle dolly forward
- Camera tracking alongside the subject
- Slow pan from left to right
- Static locked-off shot
- Handheld documentary movement
- Wide establishing shot
- Close-up with shallow depth of field
For example:
Slow cinematic dolly forward toward the subject while pedestrians move naturally in the background.
Step 3: Describe What Should Move
Don’t just describe what is visible. Explain what changes over time.
For example:
Wind gently moves the character’s hair and coat while rain falls steadily and distant vehicles pass through the background.
This gives the model temporal instructions rather than only static visual information.
Step 4: Add Audio When It Matters
Grok Imagine Video 1.5 can generate audio alongside the video. xAI says the model generates dialogue, ambience, and sound effects in the same pass.
You can therefore describe the desired sound:
Natural rainfall, distant traffic, soft footsteps and subtle city ambience.
For dialogue scenes, specify who is speaking and what they are doing.
Example Text-to-Video Prompt
A cinematic 16:9 evening shot of a modern city street after rain. The camera slowly pushes toward a woman standing beneath a transparent umbrella. Rain falls naturally, reflections move across the wet pavement, pedestrians walk in the background and distant cars pass through the frame. Her coat moves slightly in the wind. Natural rainfall, distant traffic and subtle footsteps. Realistic cinematic motion and lighting.
The goal is not to make the prompt unnecessarily long. Give the model enough information to understand subject, environment, action, camera, movement, and sound.
How to Use Grok Imagine Video 1.5 for Image-to-Video?
Image-to-video is the better choice when you already have a specific image that you want to animate.
The supplied image becomes the starting point, while your prompt tells Grok what should happen after that frame. xAI’s documentation describes this mode as using the provided image as the starting frame.
Step 1: Choose a Strong Starting Image
The quality of your source image has a major effect on the workflow.
Good starting images generally have:
- Clear subjects
- Good composition
- Consistent lighting
- Sufficient resolution
- A clearly defined foreground and background
- Minimal distracting artifacts
For example, a product photograph with the product clearly separated from its background is easier to animate than a cluttered image.
Step 2: Decide What Should Stay Still
This is an often-overlooked part of prompting.
If you’re animating a product, you may want the product itself to remain stable while the camera and environment move.
For example:
Keep the watch design, proportions and position consistent while the camera slowly moves closer.
This tells the model which visual information should remain stable.
Step 3: Describe the Motion
Now explain the transformation.
For a product:
The camera slowly pushes toward the watch while soft reflections move across the glass. The background remains subtly out of focus.
For a portrait:
The subject gently turns toward the camera while their hair moves slightly in the breeze. Maintain facial identity and clothing throughout the shot.
Step 4: Add Sound
If the scene needs audio, describe the environment naturally:
Soft room ambience and subtle fabric movement, no music.
You can also disable generated audio through the API when you want to add your own soundtrack later. xAI’s current video documentation supports an audio-generation control for the model.
Image-to-Video Prompt Example
Suppose your starting image shows a sports car parked on a mountain road.
A useful prompt would be:
Slow cinematic camera movement from left to right around the car. The vehicle remains stationary while sunlight shifts subtly across the bodywork. Light wind moves nearby grass and small clouds drift across the sky. Maintain the original car design, proportions and environment. Natural outdoor ambience.
Notice that the prompt focuses heavily on motion rather than describing the entire image again.
That is generally a better approach for image-to-video.
How to Use Grok Imagine Video 1.5 With Reference Images?
Reference-to-video is the most flexible option when you need Grok to incorporate specific visual elements into a generated scene.
Unlike image-to-video, reference images do not simply become the starting frame. Instead, they guide the generation. xAI specifically describes this workflow as useful for virtual try-on, product placement, character-consistent storytelling, and other scenarios involving specific people, objects or clothing.
How Many Reference Images Can You Use?
The current documentation allows up to seven reference images per request. At least one reference image or voice is required for reference-to-video.
You could therefore use different references for different elements.
For example:
- Reference 1 — Character
- Reference 2 — Clothing
- Reference 3 — Product
- Reference 4 — Location
- Reference 5 — Vehicle
You then explain how those elements should interact in the prompt.
Example Reference Workflow
Imagine you’re creating a fashion advertisement.
You could provide:
Image 1: Person
Image 2: Shirt
Image 3: Runway
Image 4: Shoes
Then prompt:
The person from Image 1 walks onto the runway from Image 3 wearing the shirt from Image 2 and shoes from Image 4. They walk confidently toward the camera as the camera slowly pushes forward. Maintain the person’s appearance and clothing throughout the scene.
This is fundamentally different from simply animating Image 1.
Image-to-Video vs Reference-to-Video
The difference can be summarized simply:
Image-to-video: “Animate this image.”
Reference-to-video: “Create this scene using these visual elements.”
That distinction makes reference-to-video more useful for controlled creative compositions.
| Feature | Image-to-Video | Reference-to-Video |
|---|---|---|
| Starting image | Required | Not necessarily |
| Reference images | No | Yes |
| Maximum reference images | — | 7 |
| Character guidance | Starting frame | Reference element |
| Product guidance | Starting frame | Reference element |
| Maximum resolution | Up to 1080p | Up to 720p |
| Maximum duration | Depends on request | 15 seconds |
| Preset voice references | Available through supported workflows | Up to 3 preset voices |
| Best use | Animate an existing image | Combine specific visual elements |
The current xAI documentation explicitly says reference-to-video does not lock the first frame in the same way as image-to-video.
How to Add Voice References?
Grok Imagine Video 1.5 also supports preset voice references in reference-to-video.
xAI currently documents up to three preset voices for this workflow. Custom voice references using user-provided audio are available to trusted partners on request rather than as a generally available feature.
For example, a prompt can identify different speakers:
The person from Image 1 presents the product from Image 2 using the voice from Audio 0. A second speaker responds using the voice from Audio 1.
The API identifies preset voices using voice_id values.
This makes the feature useful for:
- Product presenters
- Dialogue scenes
- Character storytelling
- Virtual spokesperson concepts
- Short advertisements
How to Write Better Grok Imagine Video 1.5 Prompts?
Good video prompts are not necessarily the longest prompts.
The key is to describe time-based behavior.
A useful framework is:
Subject → Action → Camera → Environment → Motion → Lighting → Audio
For example:
A chef prepares pasta in a modern restaurant kitchen. The camera slowly tracks from right to left as the chef places fresh pasta into a pan. Steam rises naturally, kitchen lights reflect on stainless-steel surfaces, and background staff move subtly. Warm cinematic lighting. Natural kitchen ambience and gentle cooking sounds.
Each component answers a different question:
| Prompt element | Question it answers |
|---|---|
| Subject | Who or what is being shown? |
| Action | What happens? |
| Camera | How does the camera move? |
| Environment | Where does it happen? |
| Motion | What else moves? |
| Lighting | How should the scene look? |
| Audio | What should the viewer hear? |
Should You Describe Camera Movement?
Yes, especially when camera movement is important to the shot.
Compare:
A woman in a forest.
with:
Slow tracking shot following a woman walking through a misty forest while the camera moves gently behind her.
The second prompt communicates a sequence rather than a static image.
Useful camera instructions include:
- Slow push-in
- Dolly backward
- Tracking shot
- Orbit around subject
- Slow pan
- Tilt upward
- Static camera
- Handheld camera
- Close-up
- Wide establishing shot
Use one or two clear movements rather than combining many contradictory instructions.
How to Keep Characters and Products More Consistent?
Reference-based generation is useful for consistency, but it should not be treated as a guarantee of frame-perfect identity.
For better results:
- Use a clear reference image.
- Keep the subject visually distinct.
- Avoid unnecessary changes to clothing or appearance.
- Describe the intended movement clearly.
- Avoid overly complicated physical interactions.
- Generate multiple variations.
- Review faces, hands, objects and logos carefully.
For a product advertisement, explicitly state what should remain unchanged:
Maintain the original product proportions, logo placement and surface design throughout the shot.
For a character:
Maintain the character’s facial features, hairstyle and clothing consistently throughout the clip.
These instructions do not guarantee perfect consistency, but they communicate the priority clearly.
What Resolution Should You Choose?
The current API supports:
- 480p — faster processing and lower cost
- 720p — HD output
- 1080p — Full HD
xAI currently supports 1080p for text-to-video and image-to-video. Reference-to-video is capped at 720p.
For early experiments, 480p or 720p can make sense because you can test the concept before spending more on high-resolution generations.
For final social or marketing assets, 1080p may be preferable when the workflow supports it.
What Aspect Ratio Should You Use?
The best aspect ratio depends on where you plan to publish the video.
16:9
Best suited for:
- YouTube
- Websites
- Presentations
- Traditional landscape video
9:16
Useful for:
- TikTok
- Instagram Reels
- YouTube Shorts
- Mobile-first advertising
1:1
Useful for:
- Social feeds
- Product previews
- Certain advertising layouts
The API supports configurable aspect ratios, allowing the same model to fit different publishing workflows.
How Long Can Grok Imagine Video 1.5 Generate?
The maximum depends on the generation mode.
For reference-to-video, xAI currently specifies a maximum duration of 15 seconds. The API otherwise supports configurable duration for supported generation workflows.
For longer projects, don’t think of the model as a complete long-form video editor.
Instead, build a sequence:
Shot 1 → Shot 2 → Shot 3 → Shot 4 → Final edit
This approach gives you much greater control over continuity and pacing.
How Much Does Grok Imagine Video 1.5 Cost?
If you’re using the xAI API, pricing depends on output resolution.
| Resolution | Current API price |
|---|---|
| 480p | $0.08/second |
| 720p | $0.14/second |
| 1080p | $0.25/second |
xAI also lists image input at $0.01, while preset voice audio input is free.
For example, a 10-second generation would cost approximately:
- 480p: $0.80
- 720p: $1.40
- 1080p: $2.50
These are API prices and should not be confused with consumer Grok subscription limits.
How Fast Is Grok Imagine Video 1.5?
xAI says Video 1.5 Fast can generate a six-second 720p video in approximately 25 seconds, compared with more than 40 seconds for the previous model.
Actual API processing time can vary.
xAI describes video generation as an asynchronous process, and processing can depend on factors such as resolution, duration and operation.
For creators, this means speed is particularly valuable during iteration.
Instead of spending a long time perfecting one prompt, you can generate several candidates and select the strongest result.
Common Grok Imagine Video 1.5 Mistakes to Avoid
1. Writing a Static Image Prompt
A video prompt needs movement.
Weak:
A man standing beside a sports car at sunset.
Better:
The man slowly walks toward the car as the camera tracks sideways. Wind moves his jacket while sunlight creates subtle reflections across the vehicle.
2. Asking for Too Much Movement
Multiple characters, vehicles, camera movements and physical interactions can make a scene harder to control.
Start simple.
3. Ignoring the Starting Image
For image-to-video, the source image matters enormously.
If the image already contains poor anatomy, confusing composition or unwanted objects, prompting alone may not completely fix the problem.
4. Overloading the Prompt
Longer does not automatically mean better.
Prioritize the most important actions and visual requirements.
5. Expecting Perfect Continuity
AI video can still introduce changes between frames.
For professional content, inspect:
- Faces
- Hands
- Clothing
- Logos
- Product geometry
- Background objects
- Text
- Audio
What Is the Best Workflow for Beginners?
If you’re completely new to AI video generation, start with image-to-video.
Why?
Because you control the initial visual.
A simple workflow is:
1. Create or choose an image
↓
2. Upload it as the starting frame
↓
3. Describe one main camera movement
↓
4. Describe secondary environmental movement
↓
5. Add audio instructions if needed
↓
6. Generate several variations
↓
7. Select the strongest clip
↓
8. Edit the final sequence
Once you’re comfortable with image-to-video, move to text-to-video for scenes you want Grok to create entirely from a prompt.
Then experiment with reference-to-video when you need greater control over characters, products or multiple visual elements.
What Is the Best Workflow for Marketers?
For marketing, reference-to-video can be particularly useful.
A product campaign might use:
Product image + model image + environment image + voice → short promotional video
For example:
The presenter introduces the product while holding the referenced device. The camera slowly moves closer. The presenter speaks naturally while the product remains clearly visible. Soft studio lighting and subtle commercial ambience.
This can turn a collection of existing brand assets into a rapid prototype for an advertisement.
However, generated logos, product details, claims and spoken information should always be checked before publication.
What Is the Best Workflow for Developers?
Developers can use the xAI API to build automated video-generation workflows.
The current endpoint supports multiple modes, and only one mode can be active per request. xAI specifically notes that image and reference_images cannot be combined in the same generation request.
The API workflow is asynchronous:
Send request → receive request ID → poll status → retrieve completed video
The xAI SDK can handle polling automatically in supported workflows.
Developers can therefore build applications around:
- Automated product videos
- Social content generation
- Marketing workflows
- Character animation
- Personalized video
- Creative prototyping
- AI-powered video editors
Text-to-Video vs Image-to-Video vs Reference-to-Video: Which Should You Use?
Use text-to-video when you want Grok to create the scene from your description.
Use image-to-video when you already have the exact starting visual and want to animate it.
Use reference-to-video when you want Grok to combine specific people, products, clothing, locations or other visual elements into a newly generated scene.
A simple rule is:
Create from words → Text-to-video.
Animate an image → Image-to-video.
Build around multiple references → Reference-to-video.
Conclusion
Learning how to use Grok Imagine Video 1.5 mainly comes down to choosing the right generation mode.
Use text-to-video when you want to create a scene from a prompt, image-to-video when you want to animate a specific starting image, and reference-to-video when you need Grok to incorporate multiple visual elements into a new scene.
The current model is considerably more capable than the original June 2026 preview, with expanded generation modes, native audio, reference inputs and 1080p support for text-to-video and image-to-video.
For the best results, focus your prompts on subject, action, camera movement, environmental motion and audio rather than simply describing a static image. Start with short, controlled scenes, generate multiple variations, and treat the strongest output as a candidate for editing rather than assuming every generation will be production-ready.
Frequently Asked Questions (FAQs)
1. How do I use Grok Imagine Video 1.5?
You can use Grok Imagine Video 1.5 through supported Grok Imagine experiences or the xAI API. The API supports text-to-video, image-to-video and reference-to-video workflows.
2. Can Grok Imagine Video 1.5 turn an image into a video?
Yes. Image-to-video uses a supplied image as the starting frame and a prompt to describe the movement and scene changes.
3. Can Grok Imagine Video 1.5 generate video from text?
Yes. Text-to-video is currently supported, and xAI documents native 1080p generation for this mode.
4. How many reference images can Grok Imagine Video 1.5 use?
Reference-to-video supports up to seven reference images per request. At least one reference image or preset voice is required for that mode.
5. Can Grok Imagine Video 1.5 generate audio?
Yes. The model can generate audio alongside video, including dialogue, ambience and sound effects. Preset voice references are also supported in reference-to-video.
6. Does Grok Imagine Video 1.5 support 1080p?
Yes. The current API supports 1080p for text-to-video and image-to-video. Reference-to-video currently has a maximum resolution of 720p.
Also Read-
Grok Imagine Video 1.5: Features, Speed, Audio, Limits & Real-World Performance
Grok AI Image Generator Playbook: Mastering Grok Imagine
Grok Pricing: Plans & Costs Explained
Build with Grok API: Pricing, Free Credits, and Complete Tutorial