
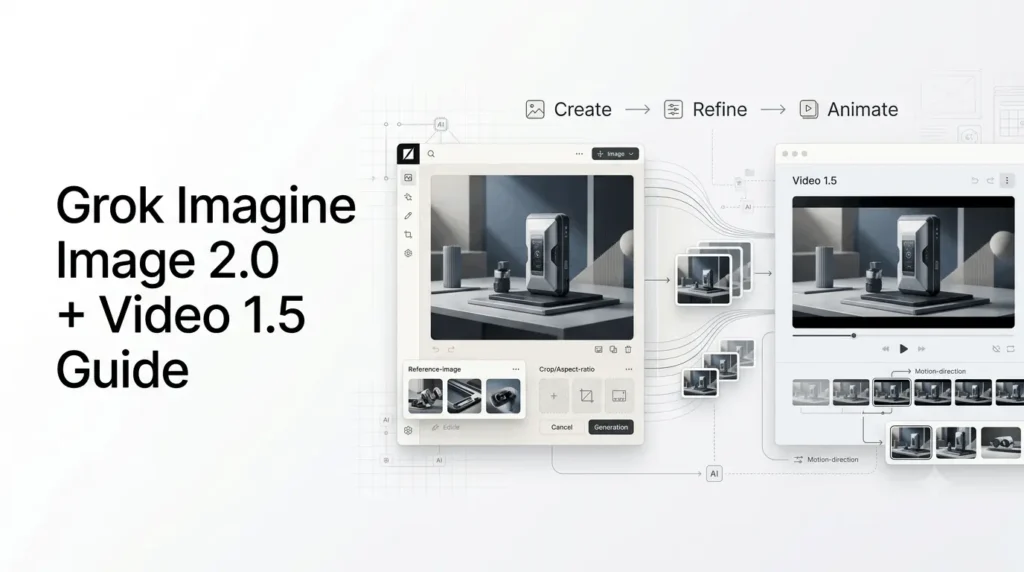
Grok Imagine has evolved from a simple AI image and video generator into a more complete creative workflow. With Grok Imagine Image 2.0 for image generation and editing and Grok Imagine Video 1.5 for animation and video creation, creators can move from an idea to a finished visual sequence without switching between multiple AI tools.
Image 2.0 focuses on instruction following, typography, editing, composition, and consistency. Video 1.5 adds stronger motion, physics, audio, and reference-based generation. Together, they support a practical workflow: create the visual foundation, refine it, animate it, and build variations from the same creative assets.
This guide explains how the two models work, what changed in the latest versions, how to structure prompts, and how to build a repeatable image-to-video workflow.
Quick Summary
- Grok Imagine Image 2.0 improves AI image generation, editing, multi-reference workflows, and precise creative control.
- Grok Imagine Video 1.5 turns images and prompts into cinematic videos with improved motion, physics, audio, and consistency.
- Use Image 2.0 first to create and refine characters, products, scenes, and visual assets before animating them.
- Reference images help maintain consistent characters, objects, and styles across images and video. The article covers practical workflows, prompting tips, marketing use cases, API pricing, and common mistakes.
- Together, Image 2.0 and Video 1.5 provide a streamlined AI image-to-video creative workflow.
What Is Grok Imagine Image 2.0 + Video 1.5?
Grok Imagine Image 2.0 is xAI’s image-generation and image-editing model, while Grok Imagine Video 1.5 is its video-generation model for creating clips from text and image references. Used together, they form a workflow where an image can become the visual starting point for an animated scene.
Image 2.0 is designed around more precise generation and editing. xAI says it can follow detailed instructions, handle typography and layouts, preserve elements during edits, and work with multiple reference images.
Video 1.5 extends that workflow into motion. The model supports text-to-video and image-to-video generation, while its newer reference workflow can incorporate multiple images and preset voices.
The simplest way to understand the relationship is:
Idea → Image 2.0 → Refined image → Video 1.5 → Animated scene → Variations
That approach is more controllable than trying to generate an entire finished video from a single text prompt.
What Changed in Grok Imagine Image 2.0?
Grok Imagine Image 2.0 was announced on August 7, 2026, and became generally available through Grok’s Imagine experience and the xAI API.
The major emphasis is control.
xAI says Image 2.0 was built to follow instructions closely, including details involving typography and layout. The model also treats editing as a core capability rather than an afterthought.
Key Image 2.0 capabilities
- Text-to-image generation
- Natural-language image editing
- Multi-reference editing
- Background removal
- Segmentation
- Region-based editing
- Smart resizing
- Multiple aspect ratios
- 1K and 2K output
- Configurable generation quality
- Templates for common creative tasks
Image 2.0 supports up to five reference images for editing. This is particularly useful when several visual elements need to be combined without manually compositing them.
For example, you could provide:
- A character reference
- A clothing reference
- A product reference
- A background reference
- A style or design reference
The result can then be refined through additional natural-language edits.
What Changed in Grok Imagine Video 1.5?
Grok Imagine Video 1.5 became generally available through the Imagine API on June 16, 2026. xAI described the update as an improvement in motion, physics, audio, and generation speed.
The model was subsequently expanded with reference-based capabilities.
Current documentation describes Video 1.5 as supporting:
- Text-to-video
- Image-to-video
- Reference-to-video
- Preset voices
- 480p, 720p, and 1080p generation depending on the workflow
- Video generation up to 15 seconds in reference-to-video workflows
Reference-to-video supports up to seven reference images, although that workflow is limited to 720p. Text-to-video and image-to-video can reach 1080p.
That distinction matters. 1080p support does not apply identically to every Video 1.5 generation mode.
Grok Imagine Image 2.0 vs Video 1.5
| Feature | Grok Imagine Image 2.0 | Grok Imagine Video 1.5 |
|---|---|---|
| Primary purpose | Image generation and editing | Video generation |
| Text input | Yes | Yes |
| Image input | Yes | Yes |
| Video output | No | Yes |
| Image editing | Yes | Limited/through video workflows |
| Reference images | Up to 5 for image editing | Up to 7 for reference-to-video |
| Maximum resolution | 2K | Up to 1080p for T2V/I2V |
| Audio | No | Yes |
| Voice references | No | Preset voices available |
| Best use | Creating the visual foundation | Animating and extending that foundation |
The two models are therefore complementary rather than competing products.
Why Use Image 2.0 Before Video 1.5?
A common mistake in AI video generation is trying to solve everything with one prompt.
You might ask for:
“A cinematic shot of a futuristic motorcycle racing through Tokyo at night.”
The result may look impressive, but you have limited control over the exact motorcycle, environment, composition, lighting, and character.
A better workflow is to create the keyframe first.
Step 1: Build the hero image
Use Image 2.0 to establish:
- Subject
- Character appearance
- Clothing
- Environment
- Camera angle
- Lighting
- Composition
- Color treatment
Step 2: Refine the image
Use Image 2.0’s editing capabilities to fix specific details rather than regenerating everything.
Step 3: Animate the approved image
Send the finished image to Video 1.5 and describe the movement.
This creates a stronger separation between visual design and motion direction.
Recommended Grok Imagine Creative Workflow
A practical production workflow looks like this:
1. Define the concept
Decide what the final image or video should communicate.
2. Generate the master image
Use Image 2.0 to create the primary frame.
3. Edit specific details
Correct the subject, background, clothing, typography, product details, or composition.
4. Create supporting assets
Generate alternate angles, locations, props, or characters when necessary.
5. Animate the strongest frame
Use Video 1.5 with an image-to-video prompt.
6. Add references when consistency matters
Use reference-to-video when several visual elements need to remain consistent.
7. Generate variations
Create alternative camera movements, pacing, or scene directions.
8. Assemble the final sequence
Combine the strongest clips in an external editor if a longer production is required.
This approach treats AI generation as a visual production pipeline rather than a one-shot prompt.
How to Write Better Image 2.0 Prompts?
Image 2.0 is designed to handle detailed instructions, so prompts should describe the actual visual requirements rather than relying on vague adjectives.
A useful structure is:
Subject + environment + composition + lighting + camera + style + important details + output format
For example:
A premium product photograph of a matte-black wireless headphone on a light stone pedestal, minimalist studio environment, three-quarter front view, soft directional lighting from the upper left, subtle shadow beneath the product, clean neutral background, realistic material texture, luxury technology advertising aesthetic, generous negative space on the right.
This gives the model information about both the subject and the intended composition.
Avoid overly generic prompts
Instead of:
“Make a beautiful futuristic product.”
Specify:
- What the product is
- Where it is positioned
- How it should be photographed
- What the background looks like
- Where the light comes from
- What should remain visible
- What visual style is required
The more important a detail is, the more explicitly it should be described.
How to Use Image 2.0 for Editing?
One of the most useful aspects of Image 2.0 is that the workflow does not have to end after the first generation.
xAI describes features including region-specific editing, segmentation, background removal, and multi-reference editing.
Instead of regenerating an entire image because one object is wrong, you can make a targeted change.
For example:
Original instruction:
Replace the smartphone in the person’s hand with a modern foldable phone. Keep the person, clothing, lighting, background, and camera angle unchanged.
This type of instruction is more useful than asking the model to recreate the entire scene.
A useful editing principle
Change one major variable at a time.
If you simultaneously change the character, background, lighting, clothing, camera angle, and product, it becomes difficult to determine what caused an unwanted result.
Iterative editing generally provides better creative control.
How to Create Consistent Characters?
Character consistency is particularly important when moving from still images into video.
Start by creating a strong character reference in Image 2.0.
Define stable characteristics such as:
- Age range
- Hairstyle
- Hair color
- Facial features
- Clothing
- Accessories
- Body proportions
- Distinctive marks
Then use that visual asset as a reference when creating additional scenes.
Image 2.0’s multi-reference workflow can also help when a project contains several important visual components. xAI specifically demonstrates building a world from separately generated characters, locations, and props while maintaining a consistent visual direction.
For example, a short film could have:
Character: Arctic explorer
Location: Frozen harbor
Prop: Antique compass
Second location: Ice fortress
Rather than asking for all four elements repeatedly, establish them as individual assets and reuse them during the creative process.
How to Turn an Image Into a Video With Video 1.5?
Once you have the right still image, the next step is motion.
The key principle is:
Do not rewrite the image description as your video prompt. Describe what changes over time.
Suppose your image shows a woman standing on a rainy city street.
A weak video prompt would repeat the entire image description.
A stronger prompt might be:
Slow cinematic push-in toward the subject as rain falls naturally around her. Her coat moves slightly in the wind. Reflections shimmer across the wet pavement. Background traffic passes softly behind her. Maintain the original character appearance, lighting, clothing, and composition. Subtle realistic camera movement.
The image establishes what exists.
The video prompt establishes what moves.
What Should You Include in a Video Prompt?
For Video 1.5, think in terms of five components:
1. Camera movement
Examples:
- Slow push-in
- Dolly backward
- Tracking shot
- Gentle orbit
- Static camera
- Handheld movement
- Crane upward
2. Subject movement
Explain what the main subject does.
For example:
The character slowly turns toward the camera.
3. Environmental movement
Add secondary motion:
- Wind
- Rain
- Smoke
- Dust
- Water
- Traffic
- Falling leaves
- Moving clouds
4. Timing and pacing
Use phrases such as:
- Slowly
- Gradually
- In one continuous movement
- Subtle motion
- Fast acceleration
- Slow-motion movement
5. Continuity
Explicitly tell the model what should remain stable.
For example:
Preserve the character’s face, clothing, architecture, lighting, and overall composition.
This is particularly useful when image consistency matters.
How to Use Reference-to-Video?
Video 1.5’s reference-to-video mode is useful when a single starting image is not enough.
The workflow can use multiple reference images to establish different elements.
For example:
- Image 1: Character
- Image 2: Clothing
- Image 3: Vehicle
- Image 4: Location
- Image 5: Prop
You can then describe how these elements interact within the scene.
The current documentation allows up to seven reference images in reference-to-video workflows. It also supports optional preset voices, while the maximum duration is 15 seconds and the maximum resolution for this specific mode is 720p.
That makes reference-to-video particularly useful for short cinematic sequences and character-driven scenes.
How to Maintain Visual Consistency Across Multiple Shots?
For longer projects, don’t treat every shot as a separate generation.
Instead, create a small visual asset library.
Build a project bible
Keep:
- Character references
- Clothing references
- Locations
- Props
- Color direction
- Camera style
- Lighting style
- Voice selection
- Important visual details
Then use those references when generating new scenes.
This is more reliable than trying to reproduce the same character from text alone.
Image 2.0’s approach to generating characters, locations, and props separately is particularly relevant to this workflow.
How to Create Marketing Content With Grok Imagine?
The Image 2.0 workflow is especially useful for marketers because xAI provides templates covering tasks such as product imagery, editorial posters, merchandise, UGC-style photos, professional headshots, and other visual assets.
A marketing workflow could look like:
Product concept → Image 2.0 → Product variations → Video 1.5 → Social clip
For example:
- Generate a clean product image.
- Create alternative backgrounds.
- Produce a vertical social-media version.
- Animate the product with a slow camera movement.
- Generate another clip with a different angle.
- Assemble the strongest shots into a short advertisement.
This allows a single product reference to become multiple content formats.
Creating Social Media Videos
For social content, start with the target format before generating the image.
Image 2.0 supports multiple aspect ratios, including vertical and widescreen formats. xAI’s examples include 9:16, 1:1, 4:3, 16:9, and other ratios.
For a vertical social video:
Image prompt:
Vertical 9:16 cinematic portrait of a modern sneaker displayed on a sculptural pedestal, premium studio lighting, clean architectural background, subject centered with additional space above and below, realistic materials, high-end advertising photography.
Then animate:
Video prompt:
Slow vertical camera push toward the sneaker while soft studio reflections move across the surface. Maintain the product’s shape, materials, colors, and position. Subtle premium advertising motion.
Planning the composition around the final format reduces the need for aggressive cropping later.
How to Use Smart Resize?
Image 2.0 includes a smart-resize capability that can recompose an image into different aspect ratios rather than simply cropping the original frame.
This is useful when one visual needs to become:
- Website banner
- Instagram-style vertical post
- Square social post
- Presentation graphic
- Blog image
- Mobile creative
The important distinction is that the system can fill the new frame while preserving the core scene.
For production work, however, always inspect important details after resizing. Elements near the edges can still require additional editing.
Grok Imagine Image 2.0 API Pricing
For developers, Image 2.0 is available through the xAI API as:
grok-imagine-image-2.0Current API pricing varies by resolution and quality:
| Output | Price per image |
|---|---|
| 1K Low | $0.04 |
| 2K Low | $0.06 |
| 1K Medium | $0.06 |
| 2K Medium | $0.08 |
Image input is currently priced at $0.01 per image.
Image 2.0 supports low, medium, and auto quality settings. The current auto behavior uses low quality for image generation and medium quality for image editing, with billing based on the quality actually served.
This creates an important optimization opportunity: use lower-cost generation for exploration and reserve higher quality for final assets.
Grok Imagine Video 1.5 API Pricing
Video pricing is calculated differently because it is based on generated seconds.
Current API output pricing is:
| Resolution | Price per second |
|---|---|
| 480p | $0.08 |
| 720p | $0.14 |
| 1080p | $0.25 |
Video and image inputs can also incur input charges depending on the workflow.
For example, a 10-second 1080p generation would have a base output cost of:
10 × $0.25 = $2.50
That makes iteration strategy important.
Instead of generating dozens of expensive high-resolution clips immediately, creators can first establish the concept at a lower resolution and reserve higher-resolution generations for selected shots.
A Cost-Efficient Creative Workflow
For API users, a practical workflow is:
Phase 1: Exploration
Generate multiple image concepts at lower quality.
Phase 2: Refinement
Select the strongest concept and edit it.
Phase 3: Final image
Generate or edit the approved image at the required quality and resolution.
Phase 4: Motion testing
Use shorter or lower-resolution video generations to test movement.
Phase 5: Final video
Generate the selected shots at the required resolution.
This prevents spending premium generation costs on ideas that may ultimately be discarded.
Common Grok Imagine Mistakes to Avoid
1. Trying to generate everything at once
Complex prompts containing characters, products, environments, typography, camera movement, dialogue, and multiple actions can become difficult to control.
Break the process into stages.
2. Changing too many things during editing
If you change five major elements at once, you lose control over the iteration.
Make targeted edits.
3. Describing a video like a photograph
A video prompt needs movement.
Describe camera motion, subject movement, environmental motion, and pacing.
4. Ignoring aspect ratio
Create the visual around the final publishing format whenever possible.
5. Using high resolution for every experiment
Higher resolution costs more in the API.
Use an exploration-first workflow.
6. Expecting one generated clip to become a complete film
AI video is still most controllable when used as a sequence of deliberately designed shots.
7. Treating model claims as guarantees
xAI reports strong results for its models, including Image 2.0’s position on its cited image leaderboards, but benchmark and vendor-reported results should not be treated as guarantees for every creative workflow.
Best Use Cases for Grok Imagine Image 2.0 + Video 1.5
The combined workflow is particularly useful for:
- Social media creatives
- Product advertising
- E-commerce imagery
- Concept art
- Character development
- Short cinematic sequences
- Storyboarding
- Marketing campaigns
- UGC-style creative
- Game assets
- Editorial graphics
- Promotional videos
- Visual prototyping
The strongest use cases are those where creators need to move repeatedly between still images and motion.
Who Should Use Grok Imagine?
Grok Imagine is most useful for creators who want an integrated image-to-video workflow rather than separate tools for every production stage.
Creators
Useful for concept art, characters, social content, and visual experiments.
Marketers
Useful for product images, advertising concepts, social creatives, and short promotional clips.
Designers
Image 2.0’s editing, typography, resizing, and reference capabilities can reduce the number of manual steps required to create variations.
Developers
The Imagine API allows image and video generation to be incorporated into applications and automated workflows.
Is Grok Imagine Free?
Access depends on where and how you use Grok Imagine.
Image 2.0 is available through Grok’s consumer products, while both Image 2.0 and Video 1.5 are available through the xAI API. API usage is billed according to the applicable image or video pricing.
Consumer availability and usage limits can change over time, so users should check the current Grok product or subscription information before assuming that a particular generation limit or feature is permanently included in a plan.
What Is the Best Grok Imagine Workflow?
For most creators, the best approach is not to ask Grok Imagine to produce the final result in one step.
Instead:
Start with Image 2.0.
Build the visual foundation.
Refine it.
Use editing and references to correct details.
Create supporting assets.
Build characters, locations, products, and props separately where useful.
Move to Video 1.5.
Use the approved still image as the starting point.
Direct the motion.
Describe camera movement, subject actions, environmental movement, pacing, and continuity.
Generate variations.
Compare several motion directions rather than trying to perfect one prompt indefinitely.
Finish externally if needed.
Use a conventional video editor for sequencing, timing, captions, music, color correction, and final delivery.
This gives you much more control than treating the AI model as a one-click video production system.
Conclusion
The strongest way to use Grok Imagine Image 2.0 + Video 1.5 is as a connected creative pipeline rather than two independent generators.
Image 2.0 provides the foundation: characters, products, environments, compositions, typography, and refined still images. Video 1.5 then adds motion, camera direction, audio, and reference-based animation.
The most reliable workflow is therefore simple: design first, refine second, animate third, and iterate selectively.
For creators and developers, that approach provides greater control over consistency, cost, and final output while making it easier to turn a single visual idea into an entire set of images and short-form video assets.
Frequently Asked Questions (FAQs)
1. What is Grok Imagine Image 2.0?
Grok Imagine Image 2.0 is xAI’s image-generation and editing model. It focuses on detailed instruction following, typography, layouts, image editing, multi-reference workflows, background removal, and resizing. It became generally available in August 2026.
2. What is Grok Imagine Video 1.5?
Grok Imagine Video 1.5 is xAI’s video-generation model. It supports text-to-video and image-to-video, with newer reference-to-video capabilities, audio, preset voices, and resolutions up to 1080p for supported generation modes.
3. Can Grok Imagine turn an image into a video?
Yes. Grok Imagine Video 1.5 supports image-to-video generation. You can provide a starting image and describe the movement, camera behavior, atmosphere, and other actions you want to see.
4. How many reference images does Grok Imagine support?
Image 2.0 supports up to five reference images for image editing. Video 1.5’s reference-to-video workflow supports up to seven reference images. The two limits apply to different workflows.
5. Can Grok Imagine generate 1080p video?
Yes, but the resolution depends on the workflow. Video 1.5 supports 1080p for text-to-video and image-to-video. Reference-to-video is currently capped at 720p.
6. How much does Grok Imagine cost through the API?
Image 2.0 currently starts at $0.04 per 1K low-quality image, while Video 1.5 costs $0.08 per second at 480p, $0.14 per second at 720p, and $0.25 per second at 1080p. Actual costs depend on the generation configuration and inputs used.
Also Read –
Grok 4.5 Guide: What You Need to Know ?
Grok 4.6 AI Guide: Everything About Its Features, Pricing, Benchmarks and Availability
SuperGrok Pricing & Features: A Complete Guide (2026)
Grok AI Image Generator Playbook: Mastering Grok Imagine
Grok Imagine Image 2.0 + Video 1.5: Complete Creative Workflow Guide